Friday, November 26, 2010

polycarbonate panels - the install

Installing the polycarbonate panels was an exercise in patience for both of us.  Perhaps we had a little less (patience) due to the cold wind and tight timeline.  Regardless, it got done, and if I do say so myself we did it well!

Mega-Lock Aluminum Glazing System
A profile of how the Mega-Lock system works
Greg started by cutting all the base profiles, then I added the gaskets.  Greg then screwed the base profiles onto each upright 2x4.


Greg measuring... and measuring. 


Installing the first base profile
I attached two strips of EPDM gasket to each base profile and cover profile.   The whole time my mouth watered for black licorice.
When that was done, Greg took accurate measurements of each opening.  The heights were all the same on this wall, but the widths varied slightly.  Next he got to work cutting the panels with a table saw.  Once cut, we blew out the little shavings with compressed air.  Cutting the panels makes quite a mess with little static-y bits everywhere so we found it best to keep the cutting and prep areas separate.  Greg also had to cut all the U profiles to the same width as the panels.

the bare panel, ready to be prepped
Then everything was ready to be prepared for install!  I peeled the protective films back about 6", wiped off any debris and added the aluminum vent tape to the top and bottom edge.

adding the aluminum vent tape
I tapped the UA Edge profile on with a rubber mallet (those tougher than me could do this by hand).  I also made sure the fit was good, and that the black side would be facing out along with the UV protected side of the panel.

the finished panel

Greg then took the panels up the scaffolding and installed them.  Initially he had some difficulty getting the screws to puncture the aluminum while up against the wall, so he screwed them in partway before attaching the cap profile to the wall.  Then he held all the pieces in place and screwed the cap in place. This compresses the panels between the gaskets which makes them watertight.  We decided to leave all the cover profile pieces off until we are sure we will not need to make adjustments.


the first two panels in place, with the cap profile installed


the view from inside... see the lovely translucency of the panels?
ignore the gap at the top, Greg fixed that..


The finished panels from the inside - just look at that gorgeous light!

The finished panels from the outside.  Yes, we're missing the Left edge piece, Greg couldn't quite reach from the scaffolding.  On the list for another day.  As you can see it is cleverly tuck taped down..
You may remember that we had planned on having the panels stretch the length of the wall, but when the trusses went up we discovered that a shear wall was required on either side of the panels to stabilize the roof.  This has left us with quite an asymmetrical wall.  I think we'll be able to balance it out with some of the exterior details, and that it will ultimately lead to a more interesting facade.  Better to have a sturdy house than a pretty one (that's what i'm told...)!


The panels from the outside.  The cover profile had not yet been added, so you can see where we screwed through the top to compress the whole system together. 
We ran short of a few pieces due to the reconfiguring of our panel layout.  We decided to use the panels that would have been on the south wall (but got eliminated with the addition of the shear walls) to the east and west walls.  The sides are slightly angled, and splitting the panelled areas up resulted in needing more "end" pieces.  So, the remaining pieces are en route and will be installed upon arrival.  Had I thought ahead and ordered 10% extra to allow for waste and mistakes we may have had enough.  I don't know why I forgot to do that, but I did... one more lesson learned.

And so, the next time we install polycarbonate panels, it will be a piece of cake!  We actually do have a stack in storage which we plan to use inside.. but you will have to wait and see!


Sunday, November 21, 2010

winter wonderland

the forest has transformed into a magical land of ice and snow
perfect for snow angels.. 
and making tracks..
the best perks of building in the country..
marshmallows and a fire.

Friday, November 19, 2010

Polycarbonate - prep

Our polycarbonate panels arrived all bundled up as scheduled from Greenwall Solutions, and when we were ready for them we carefully unpacked them to get ready for our install....
You can see here the hollow cores of the panels, and that they have protective film on both sides.  The branded side faces out because it has the UV coating. 
Greg counting, re counting and counting again.  These are the U channels that secure the top and bottom of the panels. 
We chose to have the panels and aluminum pieces pre-cut slightly larger that we needed.  This was to save on shipping costs and to make handling easier.  We figured that because we were going to be installing them on the face of the trusses, there may be some discrepancy in measurements.  A good call all around.

The goodies in the box.. more on this next post
The aluminum pieces come stock in white, and we decided we would paint them black ourselves to prevent any delay.. they can be custom colored in the factory, but it adds 2-3 weeks to the delivery time and we wanted them sooner.  As it turned out the pieces sat getting rained on for at least that long so we could have had them done.  Ahh well, it's been a while since I have stretched my DIY muscles, and it gave Greg and I some quality time without the little ones... something we have not done much lately.

ready to go
A little Tremclad will do the trick 
the uprights waiting their turn
A couple of quick coats of Tremclad got everything done, and they look lovely in black!  We're thrilled with how it turned out, but I will advise that the factory finish is FAR more durable than our spray job.  The Tremclad scratches very easily, and as we still had some cutting to do some damage was done here and there.  


One more post is still to come, and I'll tell you all about the installation.  Stay tuned!

Wednesday, November 17, 2010

What are Polycarbonate panels???

I certainly had not heard of polycarbonate panels until recently... but I did see them cropping up on homes in Dwell Magazine and my curiosity was piqued.
edstrom house exterior
These must be some kind of polycarbonate panel, as they are filled with Nanogel

yum yum farm house kitchen loft
Those are polycarb panels cladding the loft railing...
So after a quick google search, I discovered we have a polycarbonate panel supplier right here in Canada called Greenwall Solutions.  As it turns out these panels can be used for all kinds of things.. from greenhouses and fences to bus shelters.  They don't yellow like the old-school acrylic panels, and they are 100% recyclable when they are no longer needed.  For our purposes we chose the Polygal RFX Selectogal which is 16mm thick and features a prism that reflects heat out in the summer and lets it in during the winter.
image from greenwall solutions
We installed the panels with a nifty system called the Mega-lock Aluminum Glazing System which makes it a very doable DIY with some careful planning and patience.  Avi and Diane at Greenwall Solutions have been SO helpful, we could not have done this without their patience while we figured out challenges in installing this on the house.
Tomorrow I will start showing you the photos of our install.  It took us two weekends, but we got them all in!

Monday, November 15, 2010

windows

When we started considering our window options, we found ourselves with four options... vinyl, wood, fiberglass and aluminum.  Vinyl got eliminated immediately for a host of reasons including the risk of off-gassing, poor durability and poor structural strength which limits window size.  Aluminum windows are always attractive to me in the homes featured in magazines, but I quickly realized that they are not suited to our climate's cold winters.
source unknown
So that left us with wood and fiberglass.  My initial inclination was to fiberglass.  In truth I was not even considering wood.  In a prior house, we had wood windows that looked gorgeous but didn't insulate well enough (for me).  Obviously for this house the insulation properties of the windows are key.

As we have no local supplier of fiberglass windows, my search led me to a company in Langley called Cascadia Windows the website is impressive, and I was very happy with the service and information provided by Gerry.  I even went down to have a look at them, and received a quote.

Then, just to have something to compare to I got a price from Jason at Grand Openings who supplies Kolbe wood windows.  I was expecting the wood windows to be more costly and less well insulated compared to the fiberglass windows.  I was surprised that the price was comparable so that led me to do some more extensive research.

Fiberglass windows are highly touted online as being the most energy efficient of all the windows.  And maybe they are.  Issues related to wood windows seem to center around exposed wood windows, and using aluminum clad seems to solve those.

Before we go any further lets get into the terminology a little... here are the key terms that come up in window comparisons, I will paraphrase these definitions in my own words, but you can look here for more details.

Solar Heat Gain Coefficient (SHGC):  Puts a value on how much heat is let in through the window from direct sun exposure.  A lower SHGC number means less heat will be let in,  a higher one means more heat will be let in.

U value:  The measurement of heat loss through the window.

Whole Unit:  Refers to the entire window including the frame.

Center of Glass (COG):  Refers to a small area in the center of the window pane.

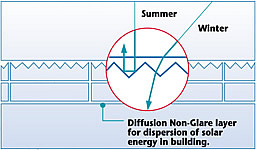
Lo E:  A coating which reflects heat back to the side of origin (out for the summer, in for the winter)

For our purposes we were looking for a SHGC of .60 or higher for the south wall and Whole Unit U value of .35 or less to retain heat in the winter.  To keep things simple let's just have a look at the two large windows on the south wall, these are the important ones for passive solar gain, and to keep heat out in the summer.  Because we want to gain heat in the winter, we want a high SHGC.  The challenge that places is how to keep heat out in the summer... and that will be solved by overhangs of 50% of the height of the window.  This allows the low winter sun to hit the windows, and shades them in the summer when the sun is high.  Nifty, right?

So here is the rundown..

Aluminum clad Wood:
LoE 179, Whole Unit U value of .31 and SHGC of .70
Factory Painted interior with VOC-free water borne stain, and 50-75% recycled aluminum with a low VOC Fluoropolymer finish.

Fiberglass:
LoE 179, COG U value of .22 and SHGC of .59
Factory painted interior and exterior with water-borne urethane coating.  Fiberglass in by nature a recycled product made from waste glass.

For us, the fact that Cascadia did not have whole unit U values available was the deciding factor.  Although everything I have read indicates that fibreglass is the most energy efficient option, I felt like I couldn't make the decision without complete information.  To feel better about the wood option we looked at using FSC certified wood for the windows from Kolbe,  but the cost was prohibitive so we decided to make do with Pine harvested in the US.  If there is one thing I have learned is that unless the budget is unlimited, compromises have to be made.  This was only one of many.

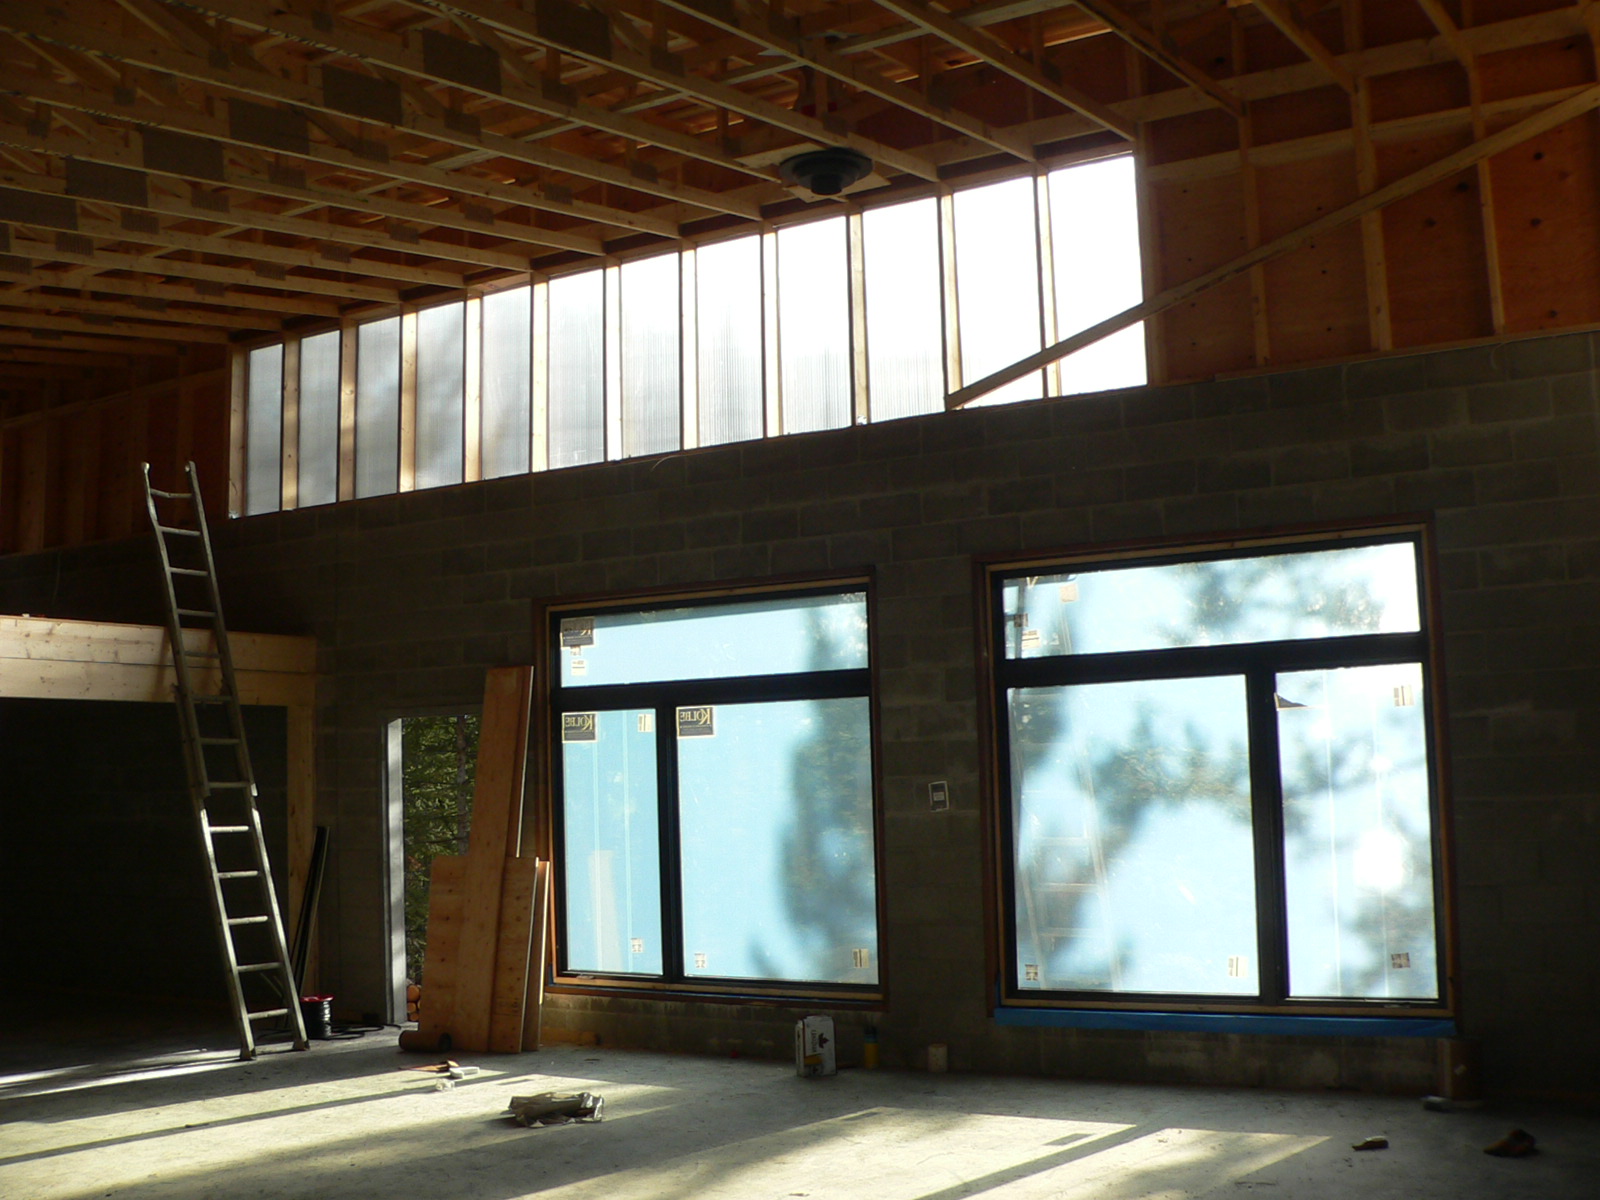
The south wall.. these beauties are 8' x 8', and the small upright sides are outswing casements

The bedroom windows are all single pane out swing casements

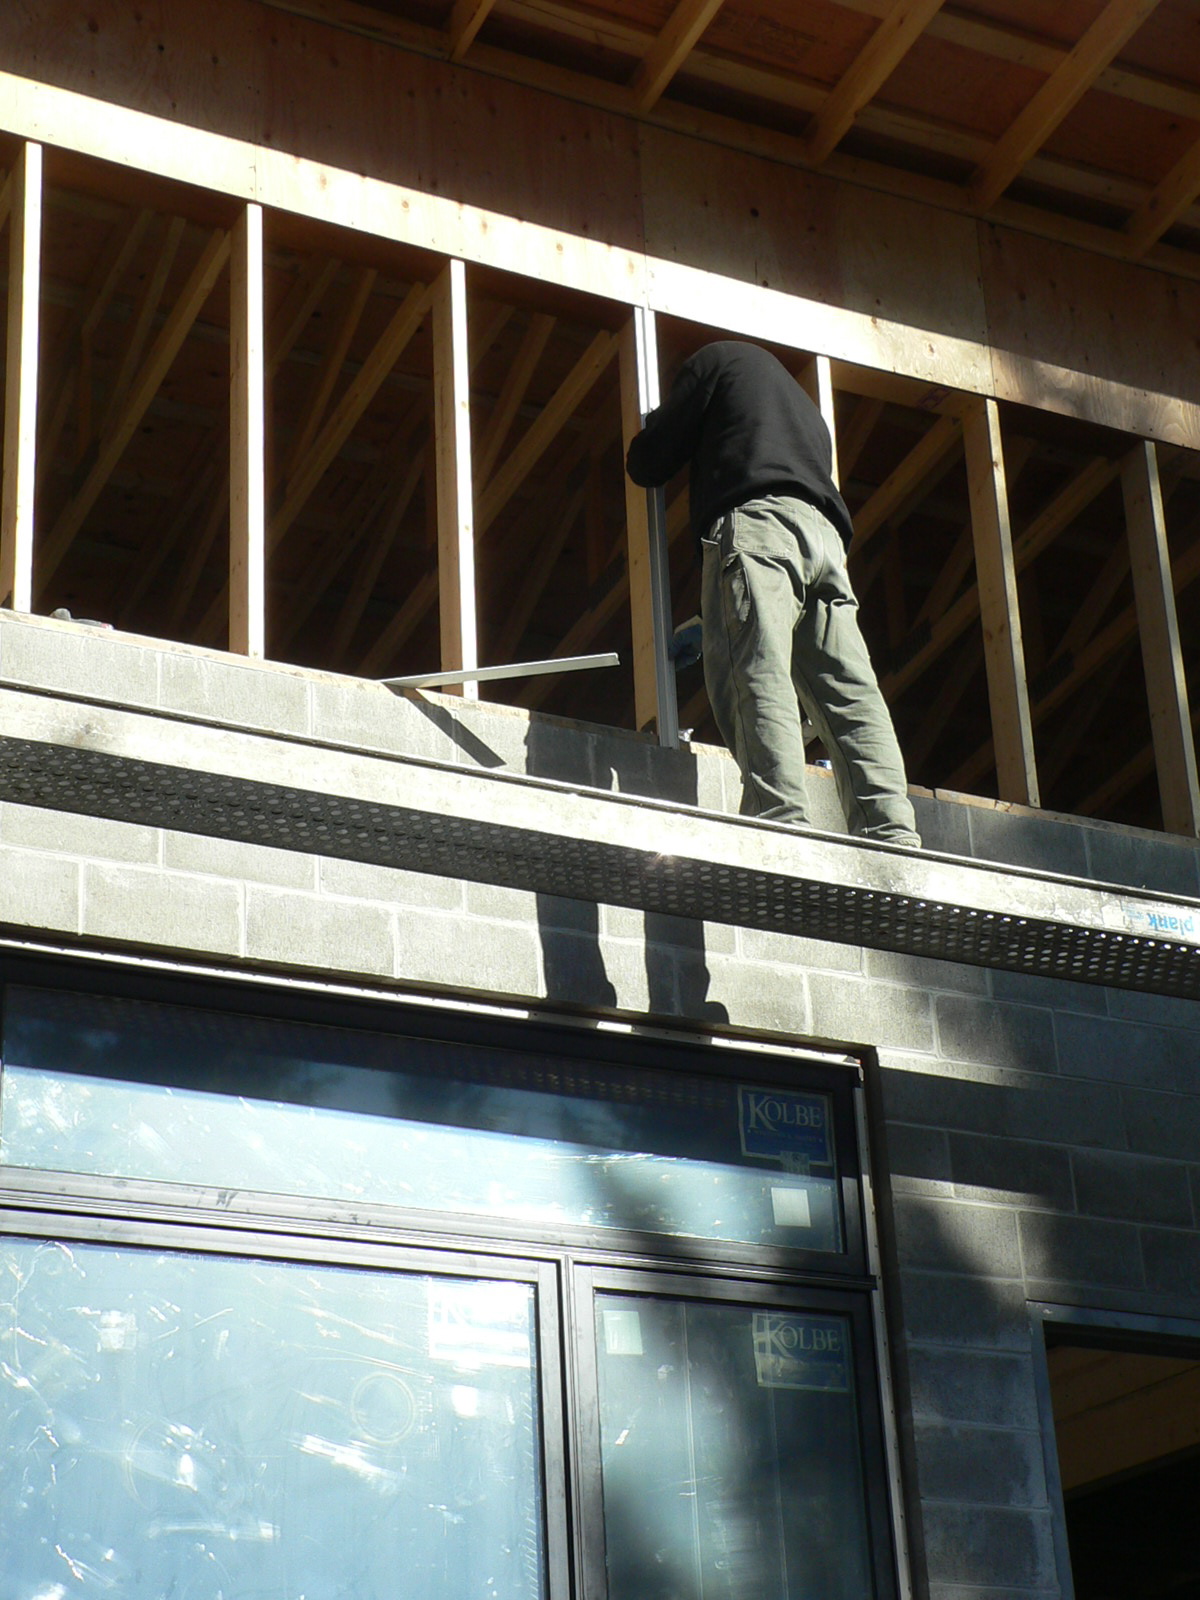
The black aluminum clad exterior 
I love the way the windows turned out.  I love the black, and the casements.  We have light pouring in all day, and I am happy with our final decision.  It was a big one.

Sunday, November 14, 2010

Framing the loft

It was so exciting to see the loft go in.. I'm getting a little behind here, so this happened a couple of weeks ago.  Joel of Arctic Wolf Homes Inc. completed this task for us, and it's fun for the kids to see where their bedroom is going to be.  It's always good to see the interior walls go in, and see how much space there will actually be in the rooms.  In this case there will be just enough room.  Definitely tight by Canadian standards, but really all we need to fit are the beds.  I figure they are huge by UK standards, so it's all about perspective, right?  What about you... do you think you could make do with small bedrooms?

That's the bathroom at the end 
Joel finishing up 
Greg is in there for scale... the ceilings will be 8 feet in the bedrooms

Little girl's very impressive scrap wood sculpture of the "grey house"

Wednesday, November 10, 2010

The roof

I don't have any really good photos, but I briefly want to mention that the roof went on!  Due to the low slope (1.5/12) we were limited in our options, but we did eventually find a local company who bends these snap lock panels on site.
sorry - not the greatest picture
We used Laing Roofing , and got the Cascadia Metals smp pre-painted steel in Charcoal.  The steel should last for 30+ years, and you can't get any more fire resistant.  The steel contains a minimum of 30% recycled content.

Little Moment

Look what I found at the forest yesterday...

Monday, November 1, 2010

finally.. floors

Wow... we have been so busy at the house, so busy in fact that I have not sat myself down to share what we have been doing (sorry about that)!
The good news is that I now have lots of catching up to do, so without further ado, here's the first on my list of things to show you.

The concrete is in!!  6" of solid grey loveliness.

Isn't it pretty?
The decision to do polished concrete for the floors was one of the easiest decisions we have made so far.  We have always wanted radiant floor heating, and as part of our effort to reduce the layers of finishes on the house it only made sense to leave the concrete exposed.  It also acts as a perfect thermal mass to absorb and radiate our passive solar heat.  The fact that I drool over polished concrete photos like this one has nothing to do with it.. really...


photo from desire to inspire

Our concrete finisher Shawn (S. Guidi Concrete Finishing) recommended polishing the concrete with a power trowel, then coating it with wax (later).  We had him look at the floor in the new grocery section of our local Wal Mart as inspiration.  Don't laugh.. that floor is gorgeous.


Two sample pads to experiment with
the finish right now

the right side has been acid etched,
the white marks are the fibres showing through

We are still experimenting with the finish, to get it just right.  Acid etching the concrete takes away the top layer of concrete, removes trowel marks and exposes some sand.  It also, unfortunately, exposes some fibres.  Right now I am leaning toward the un-etched version.  The next step will be to put some wax on it and see what happens.  

For those of you who are interested, here are the technical details... the pad averages 6" thick, and is about 1700 square feet.  Double fibre was added to the mix for extra strength, and the concrete was poured over three inches of foam and one layer of re bar (18" on center).


Bob the Newfie cutting the lines

well done Bob!

The cut lines (by BTN contracting) are in theory going to minimize cracking, but we are well aware that cracking may be inevitable.  We chose a simple over sized grid, with no lines in the bedrooms.   
We will love you, floor.  Cracks and all.