Showing posts with label polycarbonate. Show all posts

Saturday, February 5, 2011

loft railing

The loft and stairwell railing was hard for us to imagine.  We had ordered some polycarbonate panels early on for this purpose, but we had no idea how to achieve the look we were picturing in our heads.  Enter James of James Ball Construction.  Problem solved.

we used domestic hemlock posts and rails from Cajun Mouldings
James did such an amazing job, and was incredibly detail oriented and precise.  He met our wish for a minimal aesthetic by cutting a dado inside the posts, rail and shoe.  The polycarbonate slotted in and is really sturdy.   I was worried that the panels would need cross-bracing... but as it turns out they didn't, and that made me really really happy.


We wanted the posts to overhang the drywall and have exposed bolts.  I think it looks great, and I will post more pictures when we finish oiling it.  I love that I can see the kids up there, and that the railing is over-height so it feels really safe for the little guys.  The  polycarbonate looks "reeded" so it doesn't show any fingerprints (yay!) and it lets all the lovely light stream through.

Thursday, January 20, 2011

Finishing inside the Polycarbonate panels

How are we going to finish this??  Greg and I have discussed this many times, and had the idea that it could be boxed out with plywood, but no idea if that was actually possible...

The before

the before
For structural reasons (always important) we have large bolts attaching the wood framing to the concrete block, and big braces to keep the trusses stable.  Very functional, not so pretty.  Enter our finishing "team".. Randy of Triple S Contracting, Leo of L&L Creative Works, Brett of D&B Hall Custom Homes, and James of James Ball Construction (he's the railing specialist... more on his work coming soon).  And...

the after
Voila!  Beautiful, simple, chunky.. and it looks like we planned it this way all along!  The boys boxed out around all the functional bits using the same 1/2" NAUF birch plywood we used on the ceiling.

lovely, no?

Friday, November 26, 2010

polycarbonate panels - the install

Installing the polycarbonate panels was an exercise in patience for both of us.  Perhaps we had a little less (patience) due to the cold wind and tight timeline.  Regardless, it got done, and if I do say so myself we did it well!

Mega-Lock Aluminum Glazing System
A profile of how the Mega-Lock system works
Greg started by cutting all the base profiles, then I added the gaskets.  Greg then screwed the base profiles onto each upright 2x4.


Greg measuring... and measuring. 


Installing the first base profile
I attached two strips of EPDM gasket to each base profile and cover profile.   The whole time my mouth watered for black licorice.
When that was done, Greg took accurate measurements of each opening.  The heights were all the same on this wall, but the widths varied slightly.  Next he got to work cutting the panels with a table saw.  Once cut, we blew out the little shavings with compressed air.  Cutting the panels makes quite a mess with little static-y bits everywhere so we found it best to keep the cutting and prep areas separate.  Greg also had to cut all the U profiles to the same width as the panels.

the bare panel, ready to be prepped
Then everything was ready to be prepared for install!  I peeled the protective films back about 6", wiped off any debris and added the aluminum vent tape to the top and bottom edge.

adding the aluminum vent tape
I tapped the UA Edge profile on with a rubber mallet (those tougher than me could do this by hand).  I also made sure the fit was good, and that the black side would be facing out along with the UV protected side of the panel.

the finished panel

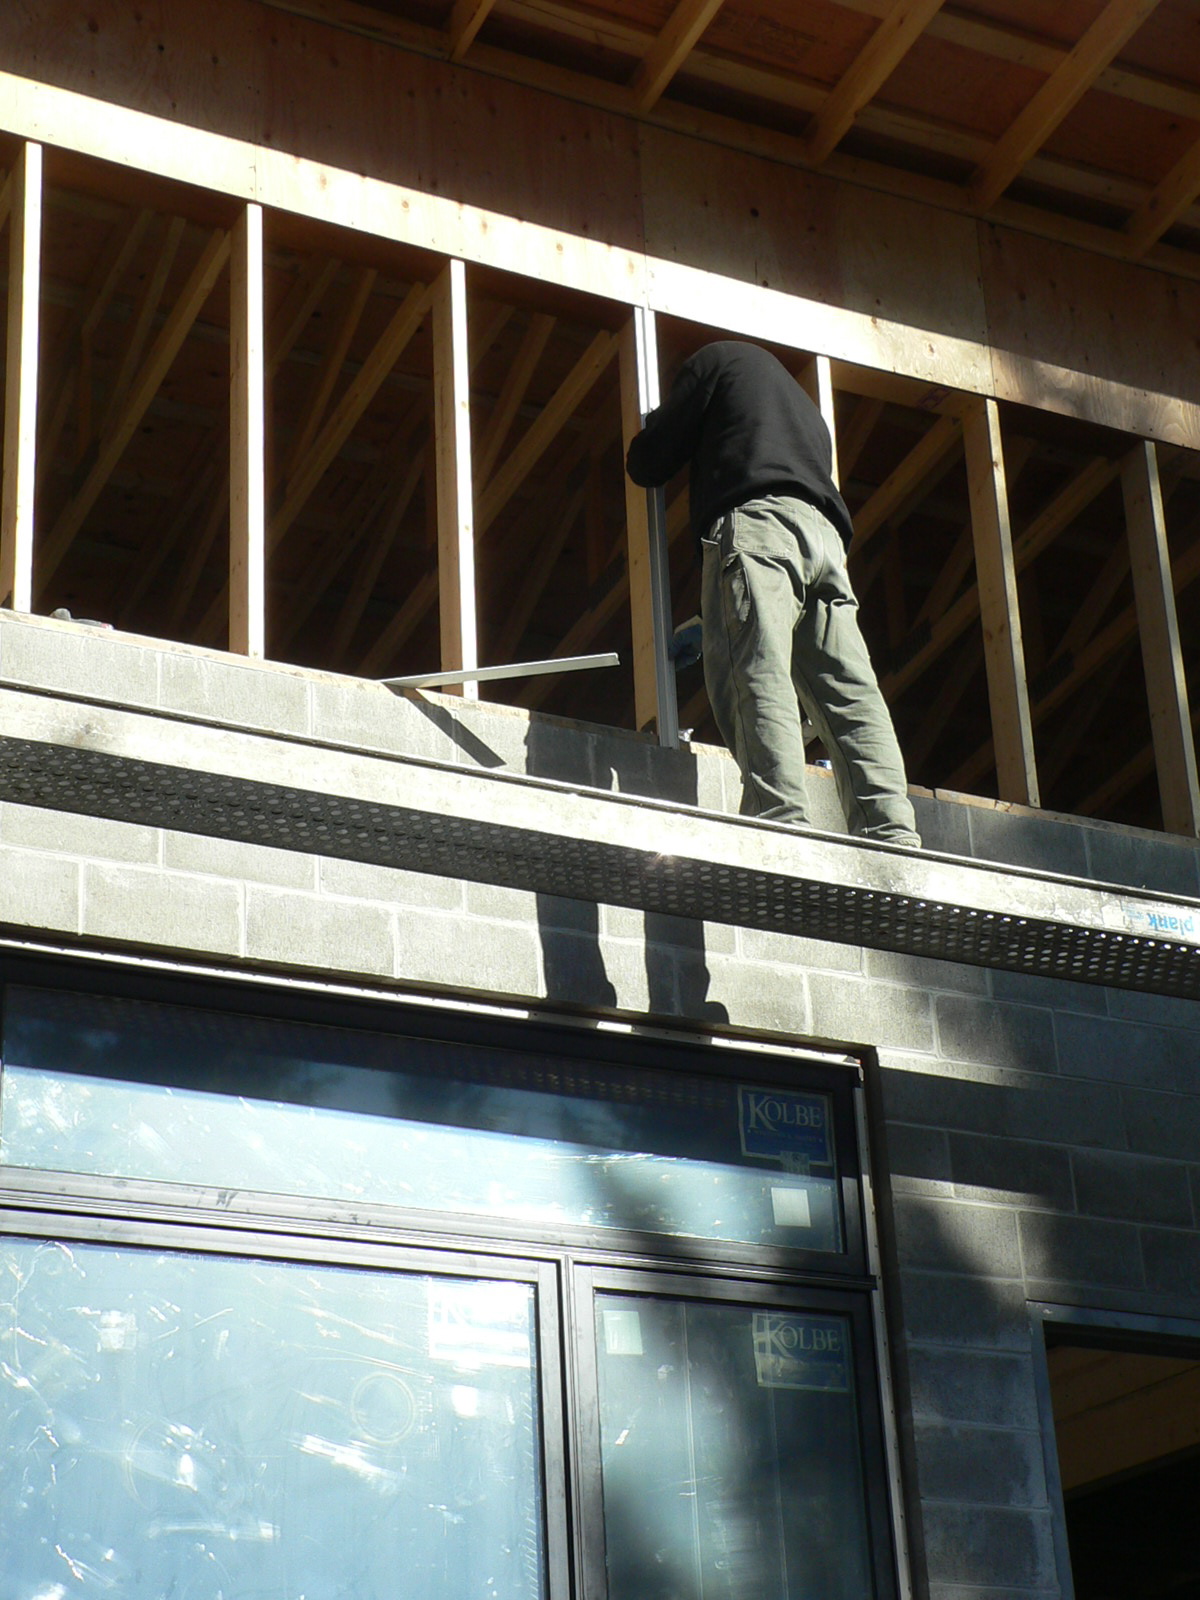
Greg then took the panels up the scaffolding and installed them.  Initially he had some difficulty getting the screws to puncture the aluminum while up against the wall, so he screwed them in partway before attaching the cap profile to the wall.  Then he held all the pieces in place and screwed the cap in place. This compresses the panels between the gaskets which makes them watertight.  We decided to leave all the cover profile pieces off until we are sure we will not need to make adjustments.


the first two panels in place, with the cap profile installed


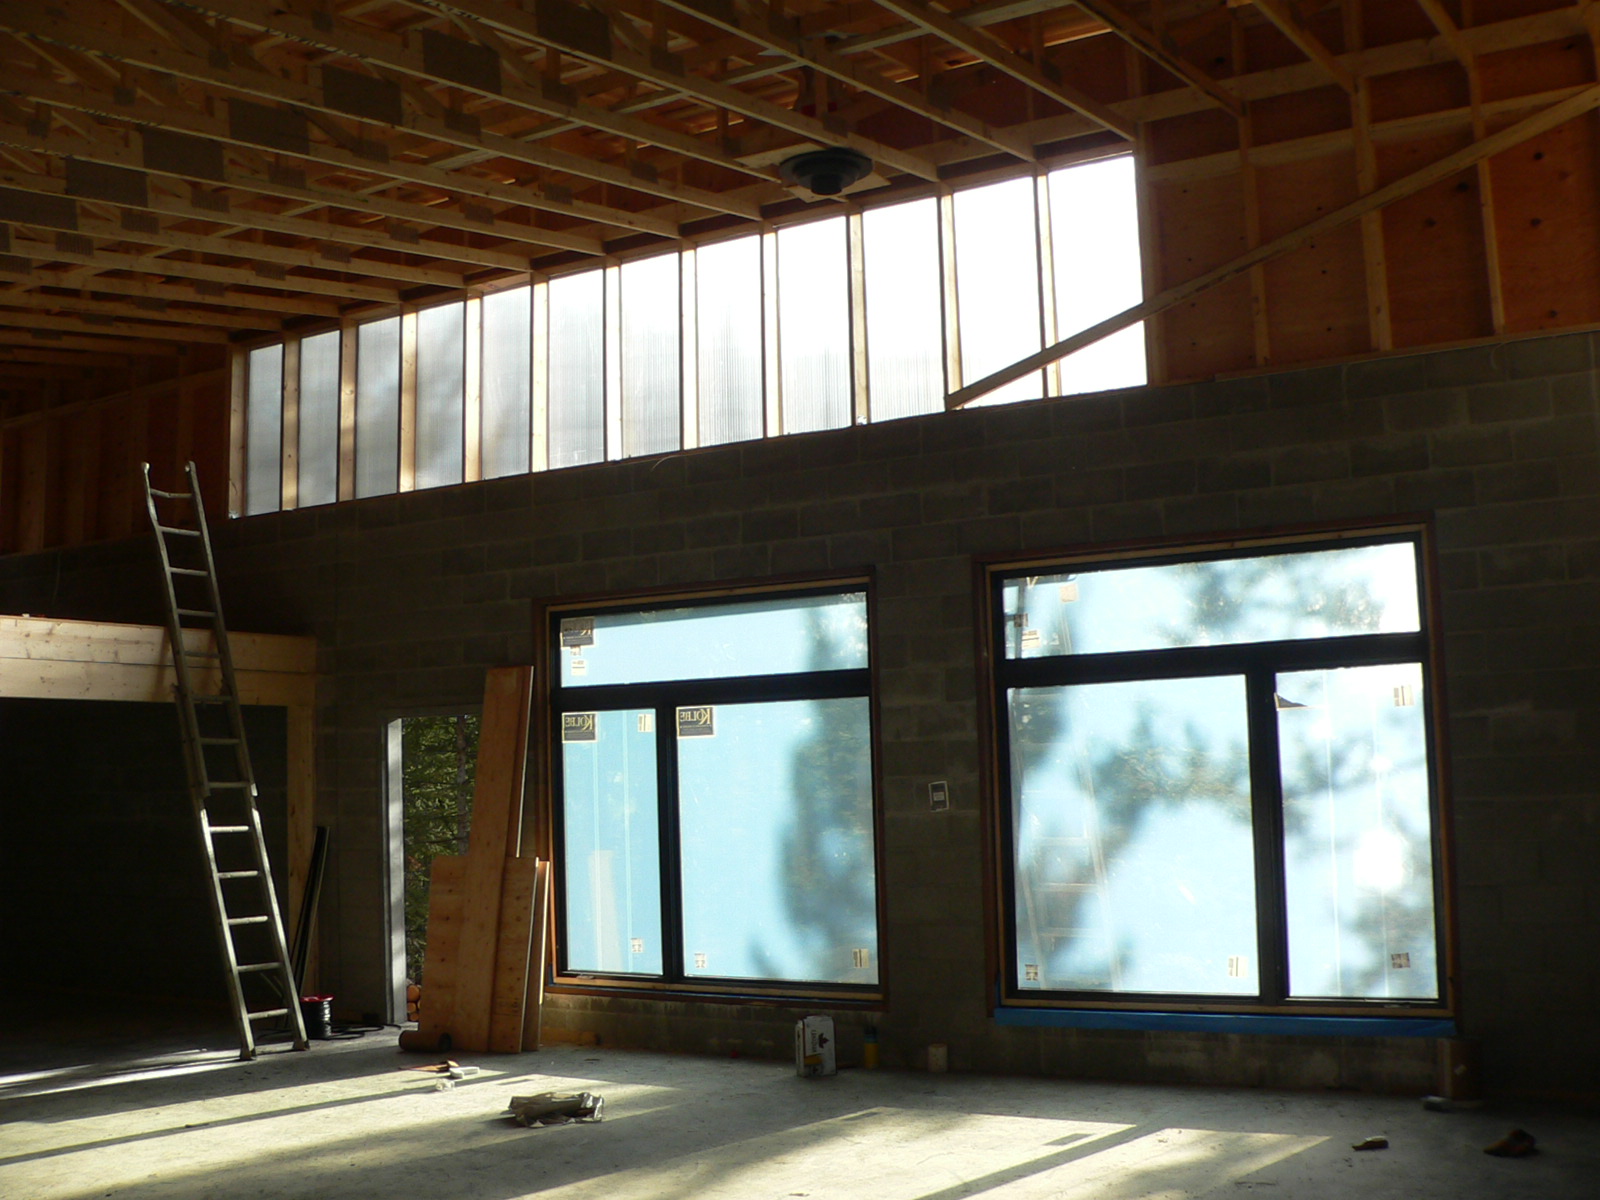
the view from inside... see the lovely translucency of the panels?
ignore the gap at the top, Greg fixed that..


The finished panels from the inside - just look at that gorgeous light!

The finished panels from the outside.  Yes, we're missing the Left edge piece, Greg couldn't quite reach from the scaffolding.  On the list for another day.  As you can see it is cleverly tuck taped down..
You may remember that we had planned on having the panels stretch the length of the wall, but when the trusses went up we discovered that a shear wall was required on either side of the panels to stabilize the roof.  This has left us with quite an asymmetrical wall.  I think we'll be able to balance it out with some of the exterior details, and that it will ultimately lead to a more interesting facade.  Better to have a sturdy house than a pretty one (that's what i'm told...)!


The panels from the outside.  The cover profile had not yet been added, so you can see where we screwed through the top to compress the whole system together. 
We ran short of a few pieces due to the reconfiguring of our panel layout.  We decided to use the panels that would have been on the south wall (but got eliminated with the addition of the shear walls) to the east and west walls.  The sides are slightly angled, and splitting the panelled areas up resulted in needing more "end" pieces.  So, the remaining pieces are en route and will be installed upon arrival.  Had I thought ahead and ordered 10% extra to allow for waste and mistakes we may have had enough.  I don't know why I forgot to do that, but I did... one more lesson learned.

And so, the next time we install polycarbonate panels, it will be a piece of cake!  We actually do have a stack in storage which we plan to use inside.. but you will have to wait and see!


Friday, November 19, 2010

Polycarbonate - prep

Our polycarbonate panels arrived all bundled up as scheduled from Greenwall Solutions, and when we were ready for them we carefully unpacked them to get ready for our install....
You can see here the hollow cores of the panels, and that they have protective film on both sides.  The branded side faces out because it has the UV coating. 
Greg counting, re counting and counting again.  These are the U channels that secure the top and bottom of the panels. 
We chose to have the panels and aluminum pieces pre-cut slightly larger that we needed.  This was to save on shipping costs and to make handling easier.  We figured that because we were going to be installing them on the face of the trusses, there may be some discrepancy in measurements.  A good call all around.

The goodies in the box.. more on this next post
The aluminum pieces come stock in white, and we decided we would paint them black ourselves to prevent any delay.. they can be custom colored in the factory, but it adds 2-3 weeks to the delivery time and we wanted them sooner.  As it turned out the pieces sat getting rained on for at least that long so we could have had them done.  Ahh well, it's been a while since I have stretched my DIY muscles, and it gave Greg and I some quality time without the little ones... something we have not done much lately.

ready to go
A little Tremclad will do the trick 
the uprights waiting their turn
A couple of quick coats of Tremclad got everything done, and they look lovely in black!  We're thrilled with how it turned out, but I will advise that the factory finish is FAR more durable than our spray job.  The Tremclad scratches very easily, and as we still had some cutting to do some damage was done here and there.  


One more post is still to come, and I'll tell you all about the installation.  Stay tuned!

Wednesday, November 17, 2010

What are Polycarbonate panels???

I certainly had not heard of polycarbonate panels until recently... but I did see them cropping up on homes in Dwell Magazine and my curiosity was piqued.
edstrom house exterior
These must be some kind of polycarbonate panel, as they are filled with Nanogel

yum yum farm house kitchen loft
Those are polycarb panels cladding the loft railing...
So after a quick google search, I discovered we have a polycarbonate panel supplier right here in Canada called Greenwall Solutions.  As it turns out these panels can be used for all kinds of things.. from greenhouses and fences to bus shelters.  They don't yellow like the old-school acrylic panels, and they are 100% recyclable when they are no longer needed.  For our purposes we chose the Polygal RFX Selectogal which is 16mm thick and features a prism that reflects heat out in the summer and lets it in during the winter.
image from greenwall solutions
We installed the panels with a nifty system called the Mega-lock Aluminum Glazing System which makes it a very doable DIY with some careful planning and patience.  Avi and Diane at Greenwall Solutions have been SO helpful, we could not have done this without their patience while we figured out challenges in installing this on the house.
Tomorrow I will start showing you the photos of our install.  It took us two weekends, but we got them all in!